![]()
PeiZen, Inc.
Phone: (805)
484-2454, FAX: (805) 383-5909
E-mail: hlee@flatmonitors.com
Websites: www.flatmonitors.com and www.peizen.com
Assembly
Instructions
For
Q-1910-RK-V
Rackmount Kit with
Viewsonic VP191b
19” TFT LCD Monitor
Tool
required:
1. No. 2 Philip screwdriver
2. 3/8” Socket wrench
3. 3/8” Crescent wrench
4. Tie wrap tool
5. Wire cutter, angled tip is
recommended
Procedures:
1. It is a good idea to power
up and test the monitor before assembling it onto the rackmount kit, just in
case if there is any problem with it (usually very rare). Otherwise, you may do all the work below and
then have to un-do it.
2. If the monitor is working
fine, then lay the foam packing material that came in the box over a flat
surface on a table or workbench. The lay
the monitor facing down over the soft foam.
3. Use a No. 2 Philip
screwdriver to remove the monitor from its stand by removing its four metric
screws and washers. Note: Please store the stand and all the metric
screws away in the box the monitor came in.
In case of warranty service, you will need to re-assemble the stand back
onto the monitor.
4.
5. Turn the monitor over facing
up. Then mount the front panel onto the
U-bracket. Then turn the monitor with
the front panel facing down on the foam pad.
6. Insert a No. 10 washer and a
10-32 locknut onto each stud (two on the right and two on the left). Use a 3/8” crescent wrench to secure the
front plate, as shown above. Try to center
the front panel vertically while tightening the locknuts.
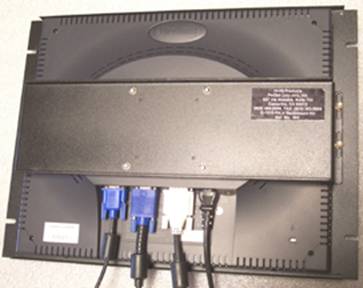
7. Insert the VGA, the DVI-D,
and the power adapter cables onto the monitor.
8. Use tie wraps to secure the
cables onto the holes on the lower flange of the U-Bracket. Then trim all excess lengths of the tie wraps
with a wire cutter.
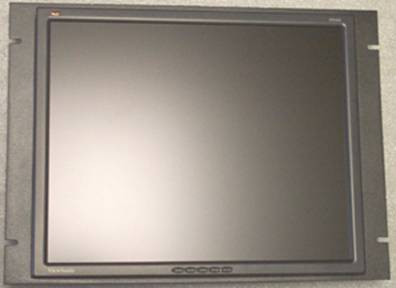
9. The monitor is now
assembled. Before mounting it onto a
rack, test the rackmount monitor assembly by connecting it to a computer. When done, mount the assembly onto a rack
with the four black 10-32 rackmount screws with nylon washers.
10. Congratulations! You have completed assembling one of the
best-looking 19” rackmount monitor in the world. If you have any questions or comments, please
call Harry Lee, 805-484-2454 or e-mail to hlee@flatmonitors.com.